AP1 - Submitting an Application to HM Land Registry

Guiding You Through the HM Land Registry Application Process
Overview
The aim of this article is to provide a comprehensive guide on submitting the new AP1 application to HM Land Registry (HMLR), explaining each section of the form and the information required to successfully complete and submit an application.
The objectives are to:
- Understand the different sections required for an HMLR application
- Learn how to correctly fill in each section
- Successfully submit an application to HMLR
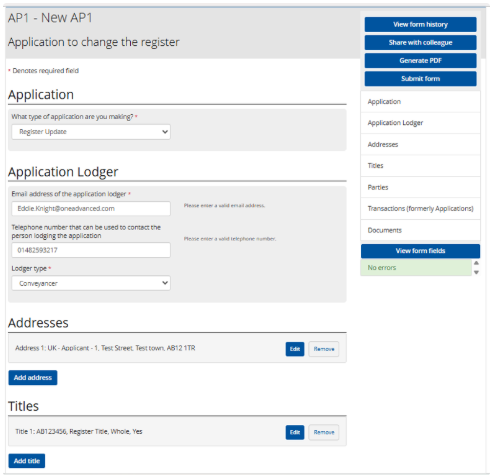
Application Type
The first step in submitting an application to HMLR is to select the correct application type. The available options include:
- Register update: For standard property transactions on existing registered titles and updates to the register without creating new title(s)
- Transfer of Part: For transferring part of a registered title to create a new title
- Dispositionary first lease: For creating a new leasehold title from a freehold or superior leasehold and granting a new or extending an existing lease
- Remove JP1: For removing a JP1 restriction. You will then need to enter the 7-character JP1 reference
Application Lodger
The application lodger section requires the following information:
- Email Address: Auto-populates with the form creator's email but can be overridden
- Telephone Number: Auto-populates with the phone number configured for the office address assigned to the form creator, can be overridden, and is optional
- Lodger Type: Select whether you are a conveyancer or not
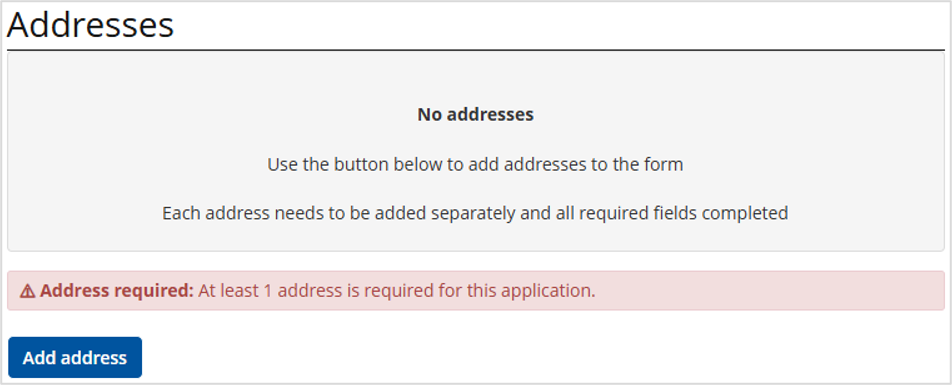
Addresses
A minimum of one address is required. You must set up each address needed for the parties involved. These addresses can be associated with multiple parties if necessary.
- Select the Add Address button
- Select the Address Type from the dropdown
- Complete the required Fields that appear on screen
- Select the Save button
- Repeat the above steps until all required addresses have been configured
Titles
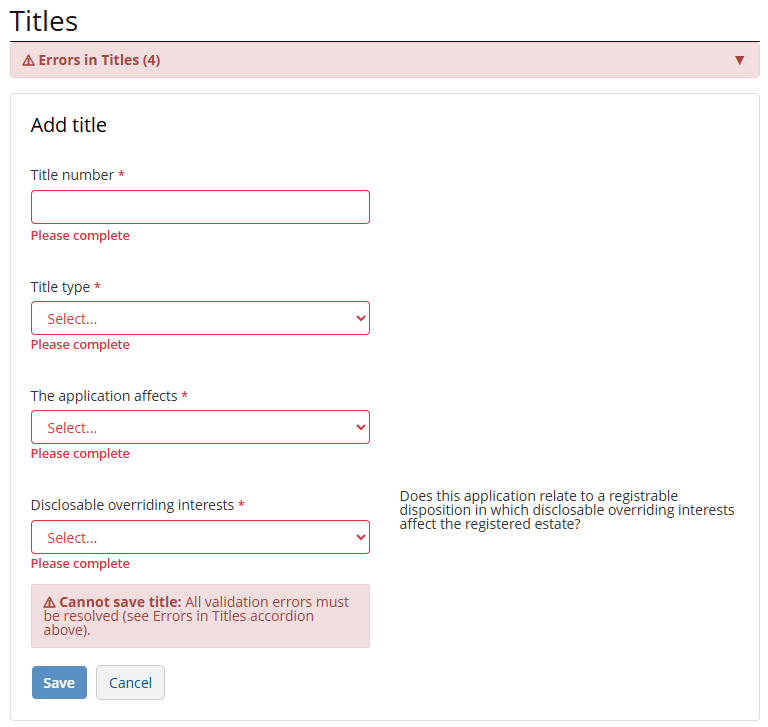
At least one title is required. You must set up each title required for the transactions in the application. The titles can be associated with multiple transactions and must be within the same district.
- Select the Add Title button
- Enter the title number in the Title Number field
- Select the Title Type based on the application type
- Select whether The Application Affects the whole or part of the title number
- Select whether there are any Disclosable Overriding Interests for the title number
- Select the Save button
- Repeat the above steps until all required titles have been configured
Parties
A minimum of one party is required, which must be an applicant. You must set up each party involved in the transactions for the application. Parties can be associated with multiple transactions, and the relevant address can be assigned for any party requiring an address for service.
- Select the Add Party button
- Choose the relevant Party Type from the dropdown
- Complete the party detail Fields that appear on screen
- Select the Save button
- Repeat the above steps until all required parties have been configured
Transactions
A minimum of one transaction is required. Each transaction must be configured individually and the required documents uploaded. Once all transactions have been created, you can change their priority by dragging them into the required order.
For each transaction:
- Select the Transaction Type from the dropdown
- Choose the Titles Associated with this Transaction from the dropdown
- Choose the relevant parties using the Add Party to Transaction dropdown
- Select the Add Party button to associate them with the transaction
- Select the Add Roles button to assign a role to each party
- Choose the relevant Capacity where required
- Select the Save button to confirm the role and capacity selection
- Complete the remaining Fields. The fields displayed will depend on the transaction type selected
- If applicable, choose the relevant Lower Value from the dropdown for the Value Band and/or the Full Value of the Property Band. The upper value will populate automatically
- Upload the required Transaction and Capacity Documents
- Once all fields have been completed and all required documents uploaded, select the Save button
- Repeat the above steps until all required transactions have been configured
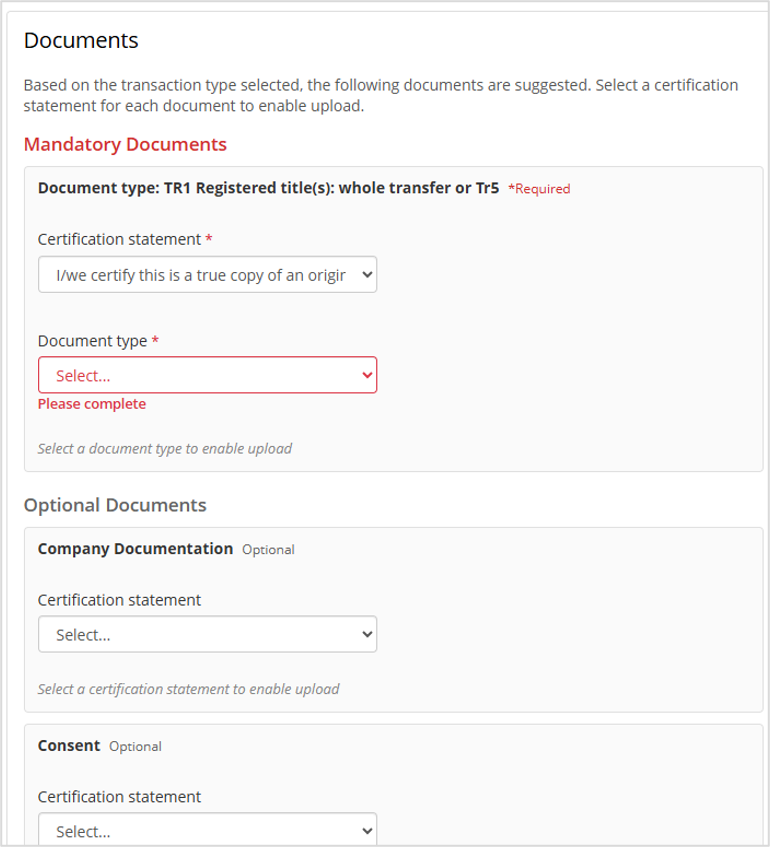
Transaction & Capacity Documents
The documents required for each transaction will depend on the transaction type and any additional questions answered. There are three categories of document requirements:
- Mandatory: Compulsory documents that must be supplied based on the transaction type
- Required Documents: A selection of compulsory document types where at least one must be provided
- Optional Documents: Additional evidence accepted by HMLR for the transaction type
Documents
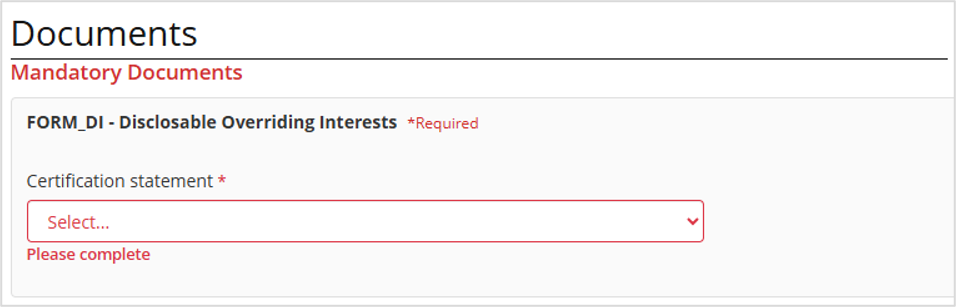
This section only appears if one or more configured titles have been flagged as having Disclosable Overriding Interests.
Submitting the Application
Once all sections have been completed and the required documents uploaded, you can submit the application to HMLR.